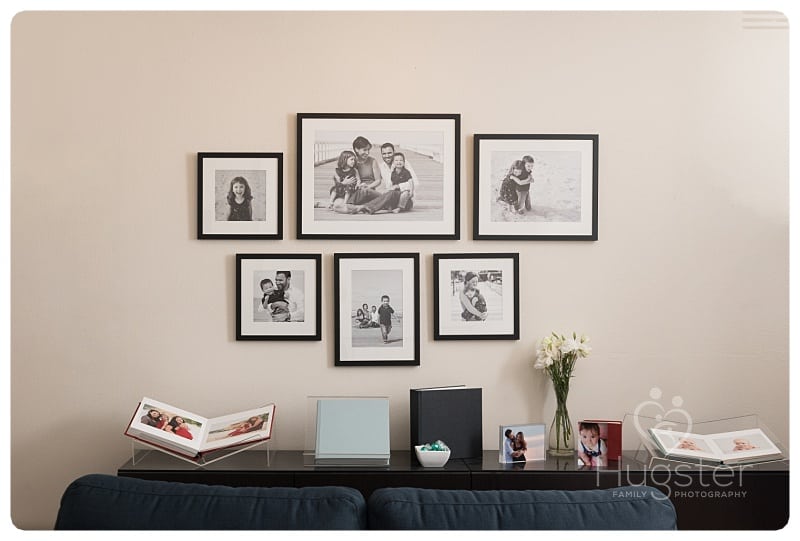
One of our most popular products is our six-frame wall collection, and for good reason. They’re a beautiful way to display your family’s different personalities and relationships and also get that ubiquitous whole-family photo frame at the same time. At your Big Reveal Session, we can design the perfect collection for you and even show you how it will look hanged on your wall. Unfortunately the one thing we can’t do is hang it for you, but it’s not hard, we promise!
With a few tools of the trade and our handy hanging guide, you can have your beautiful collection up on the wall in an hour or so, ready to enjoy for the rest of your life!
Please note that I’m assuming that you have studs in the wall at useful places, or access to strong plaster-hooks. If not, find out as much as you can about what your wall is made of (e.,g brick, plaster, wood etc) and get some advice at your local hardware store as to how to fix 5kg hooks to it. When you’re buying hooks, remember the actual load on each hook will be approximately double the weight of the frame and print, due to the way that load is spread across the wire. The largest frame in your six-frame collection is approximately 2kg, so it’s a good idea to use a set of hooks designed to hold 5kg or more each. Avoid self-adhesive hooks as they’re only hanging on the paint rather than the wall itself, no matter what the manufacturers say. We’ve seen multiple framed prints fall off walls when adhesive hooks were used (taking the paint with them) and it’s a very sad sight. 🙁
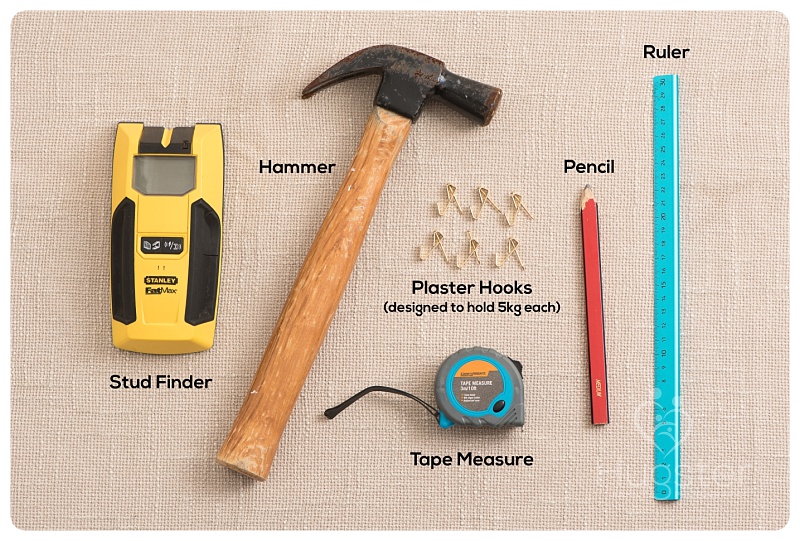
First, gather your tools. This is what you’ll need:
Planning and measuring
- Shoo away the kids, lock up the pets, make some space around you and lay the frames out on either a soft-carpet floor or a blanket.
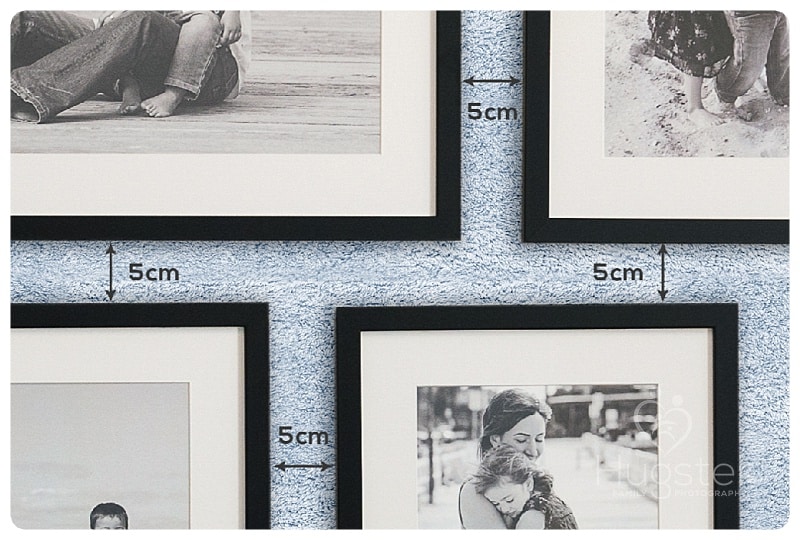
- Using the ruler, separate all of the frames by exactly 5cm (or more if you like, just keep the number the same).
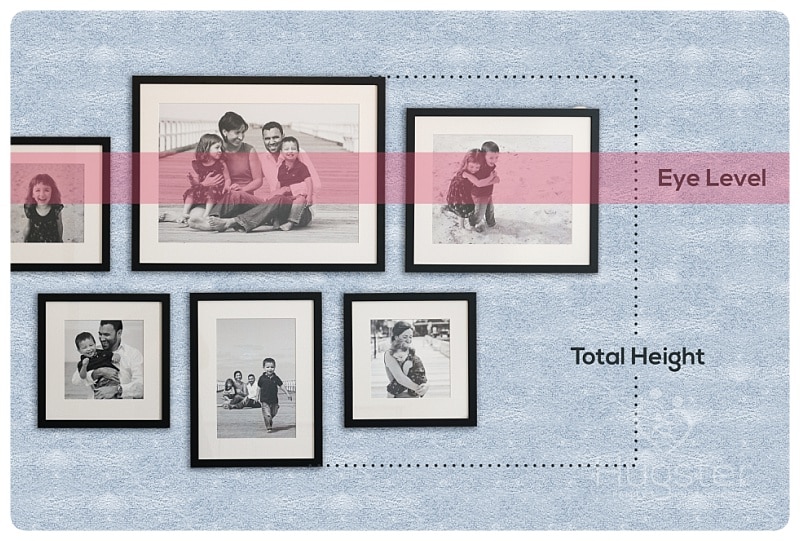
- Measure the overall height of your collection including the gap between the frames. Write this number down as Total Height. When individual frames are hung in galleries, the prints are placed so that one-third is above eye level and two-thirds below – we recommend doing the same with your collection, except that one-third of the Total Height is above eye level in this case. If the adults in your household are different heights, Eye Level should be the average of them.
- With your measuring tape still opened out to show Total Height, place it on the wall near the centre, with approximately one-third of the tape above eye level and two-thirds below. Draw a short pencil line on the wall at the top and bottom of the tape. These will mark the top of your collection and the bottom of it. Now, step back and look at the placement around your furniture and other artwork. Adjust if necessary.
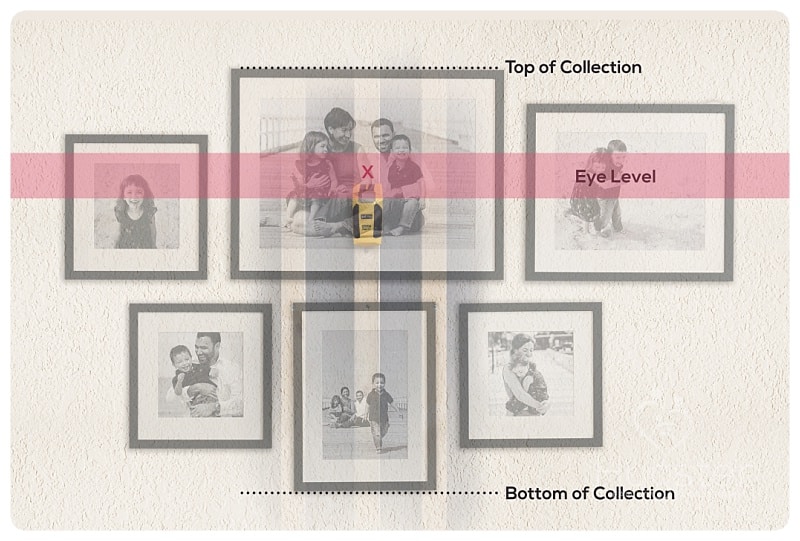
- Find the wall-stud nearest to the horizontal centre of the wall that you are hanging the frames on. If this is in a suitable place for the horizontal centre of your main frame, make a small, vertical grey-lead pencil mark on the wall at Eye Level.
(Please note: if your collection is asymmetrical, with a smaller print on one side and a larger one on the other, you may prefer to place the middle frame slightly off-centre so that the overall collection is centered on the wall. Personally, I prefer to center the main picture, so that’s what I’m describing here).
Hanging the first frame
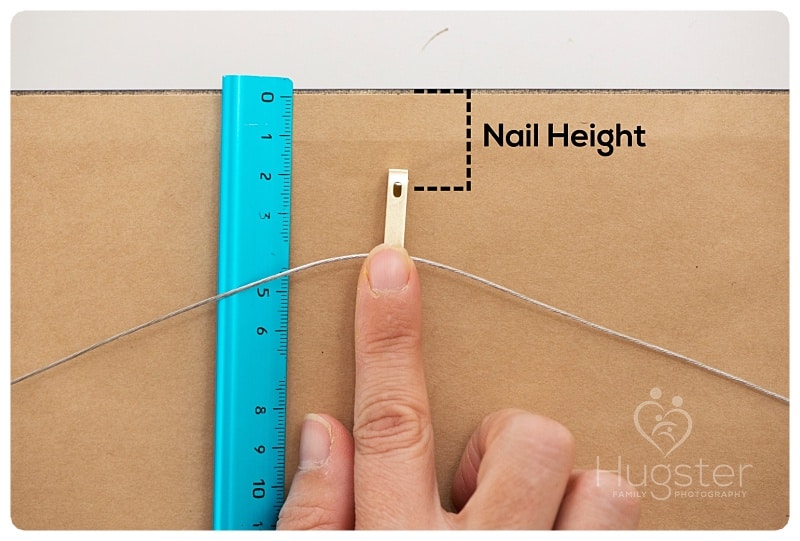
- Turn the main, central picture over on the floor, place a hook on middle of the hanging wire and gently push it up with your finger toward the top edge of the frame to mimic the way the wire will sit when the frame is hanging. Then measure the distance between the nail hole and the top of the frame. Write this number down as Nail Height.
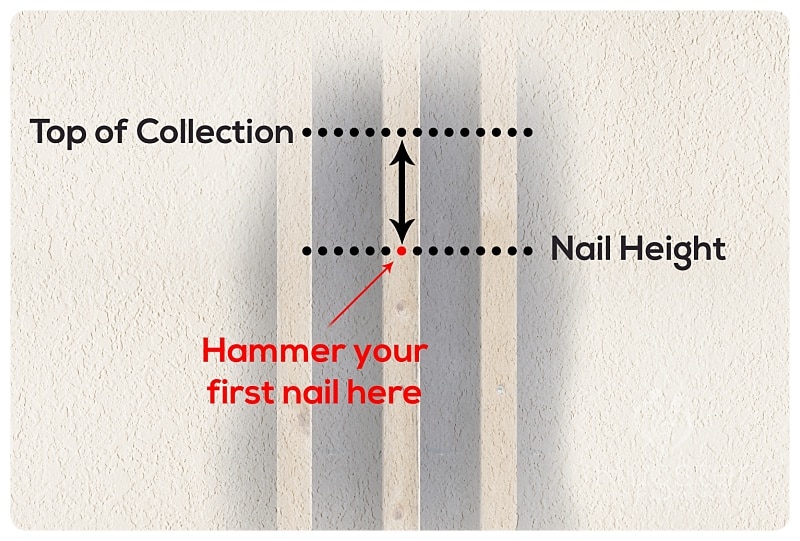
- On the wall, mark the spot where your first nail will go, which will be Nail Height below the Top Of Collection mark you made earlier, and should line up horizontally with the middle of the wall stud. Now you’re ready to hammer in the first hook!
Positioning the other frames
- Mark up the positions of the top-centre of each of the other frames, and then mark the spot Nail Height down from each of those spots, where each hook will be nailed. Remember to leave a 5cm gap between each frame horizontally and vertically.
- Hammer in all of the hooks.
- Erase all pencil marks from the walls.
- Hang the remaining frames, step back, enjoy and tick the job off your To Do list!

